Showing posts with label furniture. Show all posts

Monday, 1 April 2013

Ding dong, the chimney's gone!

Happy Easter everyone, I hope that you've had a lovely long weekend whatever you've been doing!

It's been a while between posts but it's been a busy month in our little household. We've both had a bit going on in our work worlds, I applied and was successful for a volunteering position that I will start next month, we've had some exciting baby news in the family (not us!) and....we installed a new toilet! The addition of a new toilet doesn't really compare to the other news, but hey we're pretty damn excited! When you're living in a renovators delight and with a toilet from the 70's, you tend to celebrate the small stuff. Our spiffy new toilet flushes so well (the first time!), is water saving AND it has a soft closing lid- fancy huh?!

As a side note it's lovely to know that despite no new posts there has continued to be a steady stream of people coming to have a look- thank you all so much for taking the time out of your busy lives to read my little blog!

I'm not going to miss this ugly brown thing!
So, to get to the point of the post...we've removed our chimney!  Paul started on the roof, removing all the bricks up there and then patching the hole where it was with some second hand tin from our favourite junk yard in Coburg (is it even a thing to have a fave junk yard?!).

Smile!
Last Saturday morning we removed the small stuff from the room and then covered the larger furniture with sheets and tarp. We donned the dust masks and got into demolition mode removing the lath and plaster and then Paul removed the cement sheeting that had been used for the lovely brown facade (it was previously covered with fake bricks before I attacked them one night!). I can't tell you how satisfying it was to take that ugly thing out!


There was a brick fireplace under there!
 Underneath the facade we did find a fireplace (uh-oh!) but it wasn't beautiful (I think it's probably been damaged over the years) and besides we were too committed to change our minds now!
 
Next project; to use the bricks
With dust flying around everywhere we removed the bricks and threw them out the window.  There was a frame in place above the fireplace which looked as though it had a support beam for the ceiling, so we paid a visit to Bunnings for some structural pine and the plasterboard for our temporary wall.


Check out the mess!
I'd love to be able to explain exactly what he did next, but basically he rigged it up so that the ceiling didn't cave in and then put in some temporary flooring where there were gaps. 

We (Paul especially because lets face it, I'm no builder) were pretty tired after all that so left the next steps until Thursday night and the start of the Easter long weekend.  Thursday night was the big clean- and what fun it was(n't!). Even though the couch and the TV had been covered, the layer of dust was incredible.  Dust had also made its way into the study nook which basically caused me to have a dust induced breakdown.  I have never seen such dust, especially because it required about a five stage removal before it even looked like I'd tried to get it off! Wash down, wipe, wash down, wipe and keep on wiping! I still think that I'm probably getting dust all over me just by sitting here typing- yes it's that bad.

The temporary walls and floor
On Friday the plasterboard went up, last night some timber as a finish between the old and new plaster wall and floor and today the gaps have been filled with expanding foam.

It's not exactly beautiful but it's sealed, it's neat and when it comes time to do the rest of the room one fiddly and time consuming task is done!

It was a happy day when I was able to move the furniture back in- my favourite part! It's amazing how removing a seemingly small thing in a room can create such a different feeling of space. I've rearranged the furniture in a way that I think makes much more sense and creates a nicer flow in the room (not perfect, but working with what we've got). 

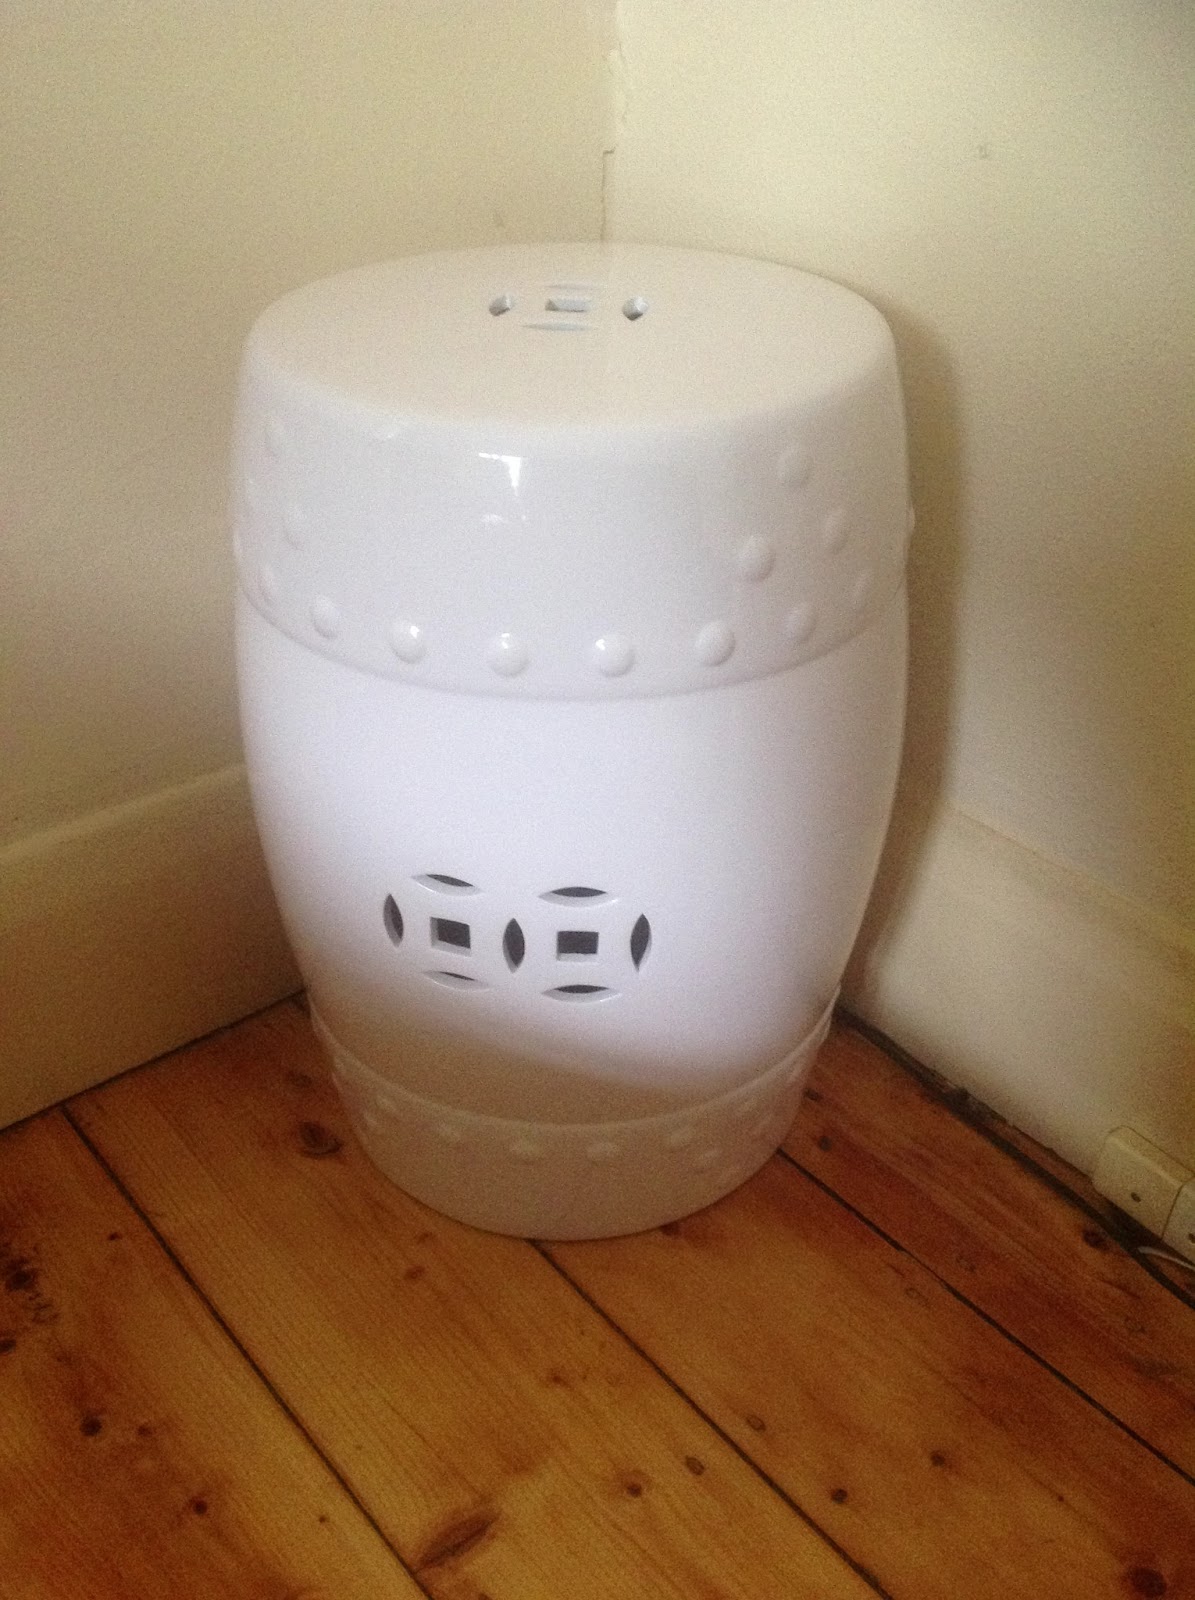
Lovely ceramic stool
The side table and bargain rug
The whitewashed table from my previous furniture makeover is now in the hallway (I liked the look of it there when I temporarily moved it there so it's staying for now), and I've replaced it with a side table from the spare room.  I also purchased this little ceramic stool from The Reject Shop for $40 and picked up a cheap rug from K-Mart today for $29 to cover the uneven floor! You've got to love a bargain or two!

Maddie and Millie enjoying the better flowing lounge room!

The best part of all is that I really feel like we're doing this! It's also been an excellent eye opener as to how much dust we're going to be dealing with when we pull out all the old plaster in the front half of the house.  At least when we're doing that, the furniture will be all out of the area so the cleaning will be focused on the room itself (which will be bad enough!).

It's also reinforced for me that if we're going to survive this renovation we need to communicate better (I'm still trying to get Paul across the line on this one!)! It's become clear that I like a bit of structure (lets call it a "strategic" plan) when it comes to these things, whereas he's more of a "give it a crack and deal with whatever happens later" kind of guy! It also doesn't help that I've never done this stuff before and I think he gets a bit tired of the constant "why are you doing it that way?" questions- when all I'm trying to do is understand what's going on! It's definitely going to be interesting (as those of you who know us really understand!), but I'm hoping that we can work on that during the planning phases and get better at it before the big stuff happens!

I'm feeling really positive that we've started and there's a lot of planning taking place. We're currently cooking up another "interim project" to utilise the bricks from the chimney so I'll keep you posted!

Wednesday, 6 March 2013

Study makeover

I've been working on a little project for a few weeks now and it's finally ready to share with you.  Since Paul made me the desk out of reclaimed timber I've been giving our little study nook a makeover!

For those of you who are familiar with the style of a Californian Bungalow house, you will know that often what was previously the front porch gets built in to use as inside floor space.

In our house, this little nook has been used as a study off our lounge room.  I haven't spent much time or energy on this room, as eventually it will be reopened up to become the front porch again. But with my beautiful new desk and increasing time spent on the computer, I decided that I wanted to make it easier on the eye as well as more practical.


You can see from the before picture that it was pretty boring uninspiring, with some bare necessities and a second hand (not to mention ill fitting) desk.

Look how lovely it looks now! A desk which fits perfectly in place, less clutter and some pretty accessories. 

The prints on the wall were wedding gifts from our friends Jess and Lach.
I decided on a blue and green colour palette with pops of yellow (and some of Paul's things in red). I love the calm of blue and green and it reminds me of being by the sea- the different blues and greens of the water and the blue of the sky.
 
To increase the amount of storage in the study, I've used two 2x2 Expedit shelving units as storage (behind the desk) and they couldn't fit better if they were made to measure! I already had one in the spare room so only had to get a second one to sit beside it.

Now we've got plenty of storage including a place where we can keep the printer so it doesn't take up space on the desk.  We also finally a have a practical filing system (including in and out trays) and I think that it looks good too!
I tried without success to find a new home for the Ducati models (top left).
Adaptability of the items that I used in the study was a key factor given nothing is permanent right now! Everything that I've used will also go well in the renovated house, either in a study or reused in other rooms. I did a lot of shopping around to find things that I liked and cost was also a consideration, given the temporary nature of the space.
 
I love having pretty, personal things around me and it's definitely the many small pieces that make a room homely and inviting to me.
 
This gorgeous print is a custom order made by my talented friend Nat at Little Puddles.  She has lots of other gorgeous prints as well as jewellery and if you like this one, you should head to her page and take a look.

The blue Tempo fan is from Bunnings (only $8.00!), the clock (which you can't see in this pic, but can see above) is from Typo and the notepaper holder was part of (another bargain) clearance stationery set from Kmart.

It's fair to say that I'm currently obsessed with glass and all things upcycled.  The pen holder is an upcycled jar wrapped in brown paper and twine that I used at Christmas as a vase, but now has another new life!


On the left side of the desk are a set of black and white Ikea canisters (that I've had for some time), and the turquoise and yellow bowls are an op shop find from last weekend. The frame I got for my birthday contains the chorus of our wedding song (I downloaded a handwritten font I loved and made it myself on the computer- easy and cheap art!) and you can also see an origami mobile that was a gift from my friend Rach.

The milk bottles are by Morgan and Finch from The Works Hawthorn (who strangely don't appear to have a website).  If you're into homewares this place is massive and worth a trip to check out. The milk bottles are holding drawing pins and clips also in blues and greens.

So there you have it, my new study! It's been a little while coming, but I think it's been worth the wait. I'm so happy with how it's come up and it's now somewhere that I love to be and work.

Wednesday, 13 February 2013

Weekend Project: Reclaimed timber desk

On Australia Day weekend we went on a mission to find some reclaimed/recycled timber so that Paul could make me a table top for our study.

I've been wanting a timber top on trestle legs ever since I saw a one in a magazine about a year ago. I decided I would wait until we did the reno, so that I knew the space that I was working with and to be honest the study has been more of the boys domain (I'm an iPad on the couch kind of gal!). But now that I'm doing more writing, I decided that I deserved a nice desk to work on as well as one that actually fits the space!

I found a great picture on Pinterest which was very similar to what I wanted, and it lead me to a great blog called Creature Comforts which has all of the DIY instructions. Seriously, I know I've said this before but what did we do before the internet? There are so many creative and talented people sharing amazing things!

So, back to the timber! We found a beautiful piece of wood and after measuring it out to make sure it was the right size for what we wanted, Paul cut it into three pieces so we could bring it home.

Apart from providing instructions and direction throughout this process, I really had nothing to do with the construction and it's probably better that way! I took photos along the way, but if you're looking for more detailed instructions, I'd definitely recommend the Creature Comforts blog. We essentially followed instructions and made some minor alterations along the way.


The three pieces of wood in the clamps after Paul planed the edges to make them even and then glued them together. The glue was left to dry overnight.

After being sanded back and adding the three support beams (old floorboards!) underneath to hold it firmly together.

This one thing I did do, finishing the the desk top with a clear lacquer. Don't you just love the wood grain?!
And here's the finished product complete with the Ikea trestle legs!

...and here's Millie doing her final inspection!
How clever is my husband? I'm so happy with the finished product and I love the fact that we've used reclaimed timber. Paul thinks that it probably comes from inside the roof of an old house and I'm so glad we've given it a new life, where it can be seen and appreciated! 

The materials cost us;
  • Reclaimed timber and floorboards- $55
  • 2x Ikea Vika Lerberg Trestle legs- $15 each
  • Bunnings flat top screws- $6 per pack
  • Clear lacquer- a tin that I already had at home
Total cost- $91.00

Can you believe that?! Freedom sells a Trestle desk for $399 and maybe I'm biased but I think ours looks better! This project actually spread over a couple of weekends because we've had a lot on, but it could be done over a long weekend allowing for overnight drying time for the glue and then another night in between the coats of lacquer.

The desk fits perfectly in the study and I'm taking this opportunity to give the whole area a makeover (yay!). The computer has been set up, and I've started pulling the area it all together, but there's more work to be done.  You guessed it... keep your eye out here for pics and details of the makeover when I'm done!

Tuesday, 8 January 2013

Weekend Project: Furniture makeover


After a busy December, it was a welcome relief to realise we had nothing planned for last weekend. After a wonderfully relaxed Saturday morning of brunch and wandering around our local second hand stores (and hearing all the history of some amazing vintage light shades from Spencer Street station at one of them) I decided that I was going to tackle a little project in the afternoon.

I have a hall table that was once my Nanna's. I've been using it as a bedside table in the spare room and thinking about giving it a makeover for a while.  I have previously had a lot of dark furniture but I'm slowly making the transition to lighter wood or white as I think it looks really fresh.  I'm loving the rustic look of whitewashing and decided that was what I wanted to do with this table. So I did some research on trusty Google (what did we do before the internet?!) and found some really great instructions.

This is what the table looked like before I started (right). The website I used, contains detailed instructions but I will run through what I did.

I started off by sanding the table back to remove the varnish.  You need to remove the shine of the varnish but it's not important to get it even all over, in fact an uneven finish is probably better as it helps add to the rustic look of the whitewashing. I used two electric sanders; a larger sander for the larger, flat surfaces and a smaller sander for the legs and any more detailed parts.
 
It took me about an hour to sand the table and here's what it looked like when I was finished (left). You can see there are some areas particularly on the top where I have sanded back further than others to create a rustic/worn look. Once I was finished the sanding I wiped the table down with a damp cloth to remove the dust.

I then made the whitewash mix by mixing 50% of a white water-based paint (any water based interior paint from Bunnings should be fine) and 50% water.  I then got a rag (an old cotton singlet) and used the rag to apply the paint to the table.

By using a rag instead of a paint brush I believe that I achieved a better result. Because the paint is thinned with the water, it dries fairly quickly.  I ended up doing about 2/3 coats and stopped when I felt that I had achieved the look that I wanted.


This is what it looked like (right) when I finished the whitewashing and then I put it in the sun for a couple of hours to dry. I have to say that whitewash is really forgiving and I don't think you can possibly do it wrong!

Once it was dry I applied a clear lacquer with a paintbrush to seal it.  I then had to wait for the lacquer to dry but it didn't actually take that long until it was dry to touch and it was ready to go!

I was really happy with the finished product and couldn't wait to get it inside and do the fun part, the styling!

Here's the finished product set up in my lounge room displaying some of my favourite things!  I love the fresh whites with a touch of black and pink which ties in with the colour scheme of my lounge room.


The makeover of this table meant that I removed two other tables from the lounge room, one of them replaced this table as a bedside in the spare room and I also moved some of my smaller pieces around from room to room. One of the things that has kept me (partially!) sane is doing lots of little things to make the house look nice with the layout we have and I like to move them around to keep things interesting.

I also had a wander around the house looking for other things to whitewash (typical me, once I get started I like to go overboard!) and also started on another little cupboard.  The whitewash has come up great but needs some other work on it, so that there's a little project for me for another weekend!